К ранее о том как устанавливается Neo4j которую я перебил с FreeBSD 12 на Ubuntu 18.04 Server поступила задача от разработчика который взаимодействует с Neo4j поставить на эту же систему еще Tomcat самой последней версии, (д аи 9 подойдет) прорабатываю. Да именно прорабатываю, т.к. Ubuntu системы не терпят безалаберного отношения к себе все должно складываться в единое по шагам.
Текущая система:
ekzorchik@srv-bionic:~$ uname -a && lsb_release -a

Linux srv-bionic 4.15.0-72-generic #81-Ubuntu SMP Tue Nov 26 12:20:02 UTC 2019 x86_64 x86_64 x86_64 GNU/Linux

No LSB modules are available.

Distributor ID: Ubuntu

Description: Ubuntu 18.04.3 LTS

Release: 18.04

Codename: bionic

ekzorchik@srv-bionic:~$
Я кажется уже как-то разбирал, как установить Tomcat, но тогда я ставил его на Ubuntu 12.04 — вот заметка: «Как я ставил Tomcat на Ubuntu Precise»
Итак Tomcat – это Web-сервер для контейнеров сервлетов, разработанный Apache Software Foundation (ASF), который выполняет сервлеты Java и отображает веб-страницы, содержащие кодирование страниц сервера Java.
Шаг №1: Устанавливаю Java, создаю группу, пользователя и скачиваю Tomcat 9:
ekzorchik@srv-bionic:~$ sudo apt-get -y install default-jdk

ekzorchik@srv-bionic:~$ java --version

openjdk 11.0.5 2019-10-15

OpenJDK Runtime Environment (build 11.0.5+10-post-Ubuntu-0ubuntu1.118.04)

OpenJDK 64-Bit Server VM (build 11.0.5+10-post-Ubuntu-0ubuntu1.118.04, mixed mode, sharing)

ekzorchik@srv-bionic:~$

ekzorchik@srv-bionic:~$ sudo groupadd tomcat

ekzorchik@srv-bionic:~$ sudo useradd -s /bin/false -g tomcat -d /home/tomcat tomcat

ekzorchik@srv-bionic:~$ wget http://mirrors.estointernet.in/apache/tomcat/tomcat-9/v9.0.30/bin/apache-tomcat-9.0.30.zip
На заметку: Если на момент когда пробуются данная заметка при скачивании этой версии, а есть более новая получаете ошибку, то просто замените v9.0.30 на новый релиз в рамках девятого.
ekzorchik@srv-bionic:~$ unzip apache-tomcat-9.0.30.zip

ekzorchik@srv-bionic:~$ sudo mv apache-tomcat-9.0.30 /home/tomcat

ekzorchik@srv-bionic:~$ sudo chown -R tomcat:tomcat /home/tomcat

ekzorchik@srv-bionic:~$ sudo chmod -R 755 /home/tomcat/
Шаг №2: Настраиваю Web—интерфейс для Tomcat:
ekzorchik@srv-bionic:~$ sudo nano /home/tomcat/conf/tomcat-users.xml

<?xml version="1.0" encoding="UTF-8"?>

<tomcat-users xmlns="http://tomcat.apache.org/xml"

xmlns:xsi="http://www.w3.org/2001/XMLSchema-instance"

xsi:schemaLocation="http://tomcat.apache.org/xml tomcat-users.xsd"

version="1.0">

<role rolename="manager-gui"/>

<role rolename="admin-gui"/>

<role rolename="manager-jmx"/>

<role rolename="manager-status"/>

<user username="admin" password="712mbddr@" roles="manager-gui,admin-gui,manager-jmx,manager-status"/>

</tomcat-users>
После не забываем сохранить внесенные изменения.
ekzorchik@srv-bionic:~$ sudo nano /home/tomcat/webapps/host-manager/META-INF/context.xml

<?xml version="1.0" encoding="UTF-8"?>

<Context antiResourceLocking="false" privileged="true" >

<Valve className="org.apache.catalina.valves.RemoteAddrValve"

allow="127\.\d+\.\d+\.\d+|::1|0:0:0:0:0:0:0:1|172.33.33.11" />

<Manager sessionAttributeValueClassNameFilter="java\.lang\.(?:Boolean|Integer|Long|Number|String)|org\.apache\.catalina\.filters\.CsrfPreventionFilter\$LruCache(?:\$1)?|java\.util\.(?:Linked)?HashMap"/>

</Context>
После не забываем сохранить внесенные изменения.
Либо можно дать доступ ото всюду:
ekzorchik@srv-bionic:~$ sudo nano /home/tomcat/webapps/host-manager/META-INF/context.xml

<?xml version="1.0" encoding="UTF-8"?>

<Context antiResourceLocking="false" privileged="true" >

<Valve className="org.apache.catalina.valves.RemoteAddrValve"

allow="\d+\.\d+\.\d+\.\d+" />

<Manager sessionAttributeValueClassNameFilter="java\.lang\.(?:Boolean|Integer|Long|Number|String)|org\.apache\.catalina\.filters\.CsrfPreventionFilter\$LruCache(?:\$1)?|java\.util\.(?:Linked)?HashMap"/>

</Context>
После не забываем сохранить внесенные изменения.
Шаг №3: Создаю файл сервиса через который можно будет останавливать и запускать Tomcat:
ekzorchik@srv-bionic:~$ sudo nano /etc/systemd/system/tomcat.service

[Unit]

Description=Tomcat servlet container

After=network.target


[Service]

Type=forking


User=tomcat

Group=tomcat


Environment="JAVA_HOME=/usr/lib/jvm/default-java"

Environment="JAVA_OPTS=-Djava.security.egd=file:///dev/urandom"


Environment="CATALINA_BASE=/home/tomcat"

Environment="CATALINA_HOME=/home/tomcat"

Environment="CATALINA_PID=/home/tomcat/temp/tomcat.pid"

Environment="CATALINA_OPTS=-Xms512M -Xmx1024M -server -XX:+UseParallelGC"


ExecStart=/home/tomcat/bin/startup.sh

ExecStop=/home/tomcat/bin/shutdown.sh


[Install]

WantedBy=multi-user.target

ekzorchik@srv-bionic:~$ sudo systemctl enable tomcat

Created symlink /etc/systemd/system/multi-user.target.wants/tomcat.service → /etc/systemd/system/tomcat.service.

ekzorchik@srv-bionic:~$ sudo systemctl daemon-reload

ekzorchik@srv-bionic:~$ sudo systemctl stop tomcat && sudo systemctl start tomcat && sudo systemctl status tomcat | head -n5

● tomcat.service - Tomcat servlet container

Loaded: loaded (/etc/systemd/system/tomcat.service; enabled; vendor preset: enabled)

Active: active (running) since Wed 2020-01-22 20:59:44 MSK; 16ms ago

Process: 4731 ExecStart=/home/tomcat/bin/startup.sh (code=exited, status=0/SUCCESS)

Main PID: 4738 (java)

ekzorchik@srv-bionic:~$

ekzorchik@srv-bionic:~$ sudo netstat -tulpn | grep java

tcp6 0 0 :::8009 :::* LISTEN 4738/java

tcp6 0 0 :::8080 :::* LISTEN 4738/java

tcp6 0 0 127.0.0.1:8005 :::* LISTEN 4738/java

ekzorchik@srv-bionic:~$
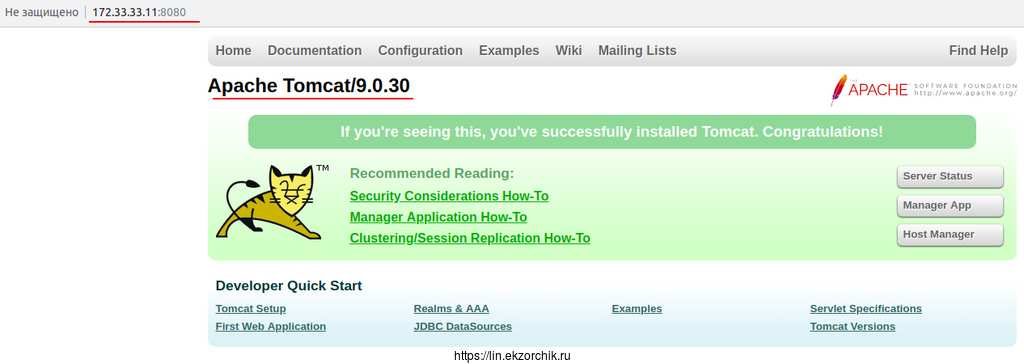
Шаг №4: Теперь у меня есть доступ в Web—интерфейс Tomcat посредством URL ссылки вида: http://IP&DNS:8080 или http://172.33.33.11:8080
Если нажать «Manager App«, то я получаю ошибку доступа:
"403 Access Denied

You are not authorized to view this page.

By default the Manager is only accessible from a browser running on the same machine as Tomcat. If you wish to modify this restriction, you'll need to edit the Manager's context.xml file.

If you have already configured the Manager application to allow access and you have used your browsers back button, used a saved book-mark or similar then you may have triggered the cross-site request forgery (CSRF) protection that has been enabled for the HTML interface of the Manager application. You will need to reset this protection by returning to the main Manager page. Once you return to this page, you will be able to continue using the Manager application's HTML interface normally. If you continue to see this access denied message, check that you have the necessary permissions to access this application.

If you have not changed any configuration files, please examine the file conf/tomcat-users.xml in your installation. That file must contain the credentials to let you use this webapp.

For example, to add the manager-gui role to a user named tomcat with a password of s3cret, add the following to the config file listed above.

<role rolename="manager-gui"/>

<user username="tomcat" password="s3cret" roles="manager-gui"/>

Note that for Tomcat 7 onwards, the roles required to use the manager application were changed from the single manager role to the following four roles. You will need to assign the role(s) required for the functionality you wish to access.

manager-gui - allows access to the HTML GUI and the status pages

manager-script - allows access to the text interface and the status pages

manager-jmx - allows access to the JMX proxy and the status pages

manager-status - allows access to the status pages only

The HTML interface is protected against CSRF but the text and JMX interfaces are not. To maintain the CSRF protection:

Users with the manager-gui role should not be granted either the manager-script or manager-jmx roles.

If the text or jmx interfaces are accessed through a browser (e.g. for testing since these interfaces are intended for tools not humans) then the browser must be closed afterwards to terminate the session.

For more information - please see the Manager App How-To."
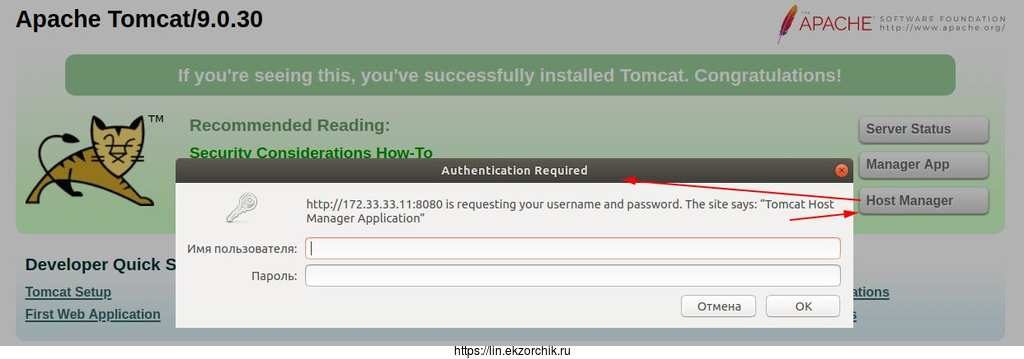
А вот Host Manager запросил аутентификацию
Имя пользователя: ввожу adminПароль: ввожу 712mbddr@
и нажимаю «ОК»
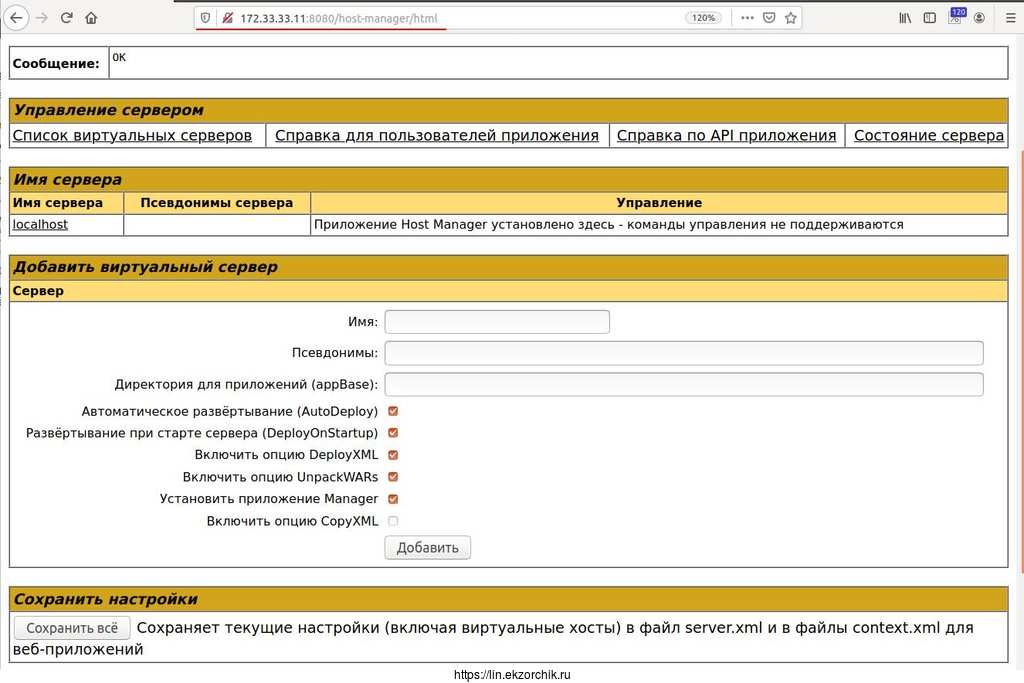
И меня впустило, URL ссылка изменилась на http://172.33.33.11:8080/host-manager/html
Шаг №5: Вот только я же отредактировал tomcat-users.xml как требует документация. В чем же проблема, разбираюсь. Сделал нижеследующее.
admin-gui - allows access to the HTML GUIadmin-script - allows access to the text interfacemanager-gui - allows access to the HTML GUI and the status pagesmanager-script - allows access to the text interface and the status pagesmanager-jmx - allows access to the JMX proxy and the status pagesmanager-status - allows access to the status pages only
ekzorchik@srv-bionic:~$ sudo nano /home/tomcat/conf/tomcat-users.xml

<?xml version="1.0" encoding="UTF-8"?>

<tomcat-users xmlns="http://tomcat.apache.org/xml"

xmlns:xsi="http://www.w3.org/2001/XMLSchema-instance"

xsi:schemaLocation="http://tomcat.apache.org/xml tomcat-users.xsd"

version="1.0">

<role rolename="manager-gui"/>

<role rolename="manager-script"/>

<role rolename="manager-jmx"/>

<role rolename="manager-status"/>

<role rolename="admin-gui"/>

<role rolename="admin-script"/>

<user username="admin" password="712mbddr@" roles="manager-gui,manager-script,manager-jmx,manager-status,admin-gui,admin-script"/>

</tomcat-users>

ekzorchik@srv-bionic:~$ sudo systemctl stop tomcat && sudo systemctl start tomcat && sudo systemctl status tomcat | head -n5
Шаг №6: После ничего не поменялось, а потому до установил в систему Nginx и обозначил что при обращении к корню на порт 80 должен отобразится Tomcat и вот только тогда доступ к элементам меню заработал:
ekzorchik@srv-bionic:~$ sudo apt-get -y install nginx

ekzorchik@srv-bionic:~$ sudo nano /etc/nginx/sites-available/tomcat.conf

upstream tomcat {

server 127.0.0.1:8080 weight=100 max_fails=5 fail_timeout=5;

}


server {

listen 80;

server_name 172.33.33.11;


location / {

proxy_set_header X-Forwarded-Host $host;

proxy_set_header X-Forwarded-Server $host;

proxy_set_header X-Forwarded-For $proxy_add_x_forwarded_for;

proxy_pass http://tomcat/;

}

}

ekzorchik@srv-bionic:~$ sudo ln -s /etc/nginx/sites-available/tomcat.conf /etc/nginx/sites-enabled/tomcat.conf

ekzorchik@srv-bionic:~$ sudo unlink /etc/nginx/sites-available/default

ekzorchik@srv-bionic:~$ sudo rm /etc/nginx/sites-enabled/default

ekzorchik@srv-bionic:~$ sudo rm /var/www/html/index.nginx-debian.html

ekzorchik@srv-bionic:~$ sudo nginx -t

nginx: the configuration file /etc/nginx/nginx.conf syntax is ok

nginx: configuration file /etc/nginx/nginx.conf test is successful

ekzorchik@srv-bionic:~$

ekzorchik@srv-bionic:~$ sudo systemctl restart nginx
И теперь Tomcat 9 открывается через обращение на http://IP&DNS:80 порт
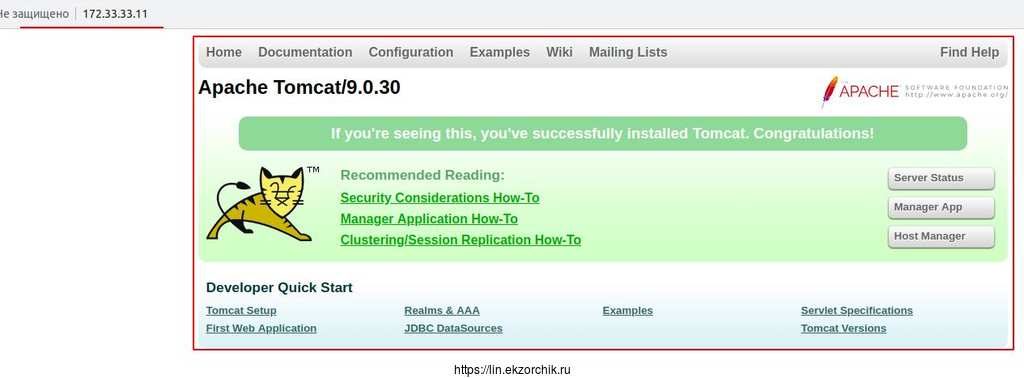
и заработали все доступы: "Server status, Manager App, Host Manager"
Пусть тогда будет хотя бы так.
Задача выполнена, установка Tomcat 9 на Ubuntu 18.04 Server работоспособна и выглядит теперь как пошаговая заметка. На этом у меня всё, с уважением автор блога Олло Александр aka ekzorchik.